

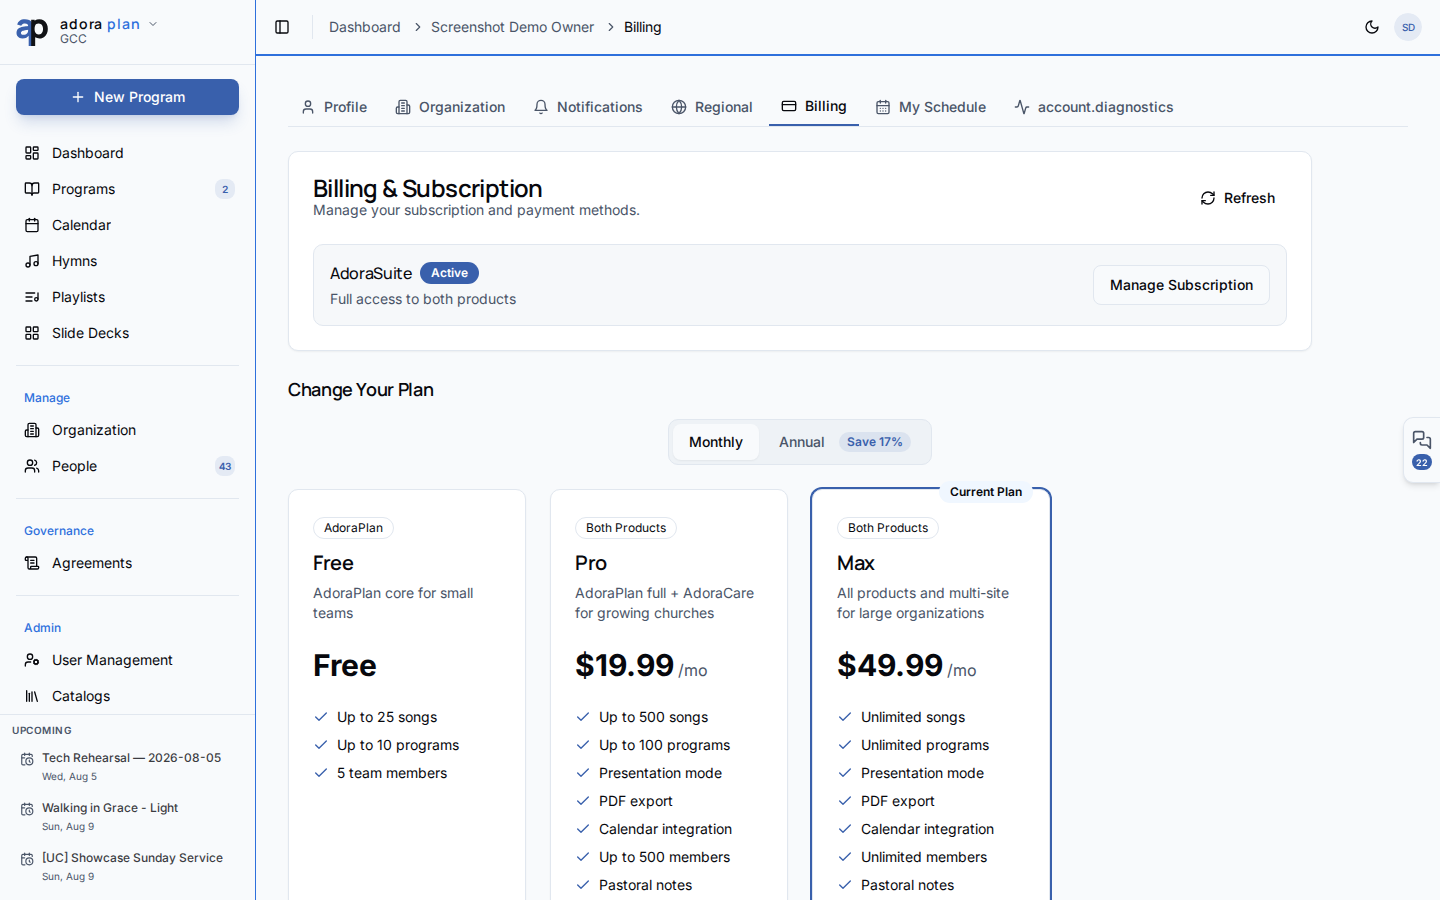
Quick Start
- Click your avatar → Account → Billing.
- Review your current plan, status, and renewal date.
- Click Manage Subscription to open the Stripe customer portal (active subscribers).
- Compare plans below and choose monthly or annual billing.
- Complete checkout — your plan activates after payment is confirmed.
/admin/billing) with the same plan overview plus a link to billing history in Stripe.
How-to Guide
Plans
Plan cards show feature highlights: song and program limits, member caps, presentation mode, PDF export, advanced reports, and more. Limits come from your church’s active subscription.
Current plan card
The top card shows:- Plan name and description
- Status badge — Trial, Active, Canceling, or Current (free)
- Billing interval (Monthly / Annual) when subscribed
- Trial end date or next renewal / access-end date
Checkout and activation
- Pick a plan and billing interval on the pricing cards.
- Stripe Checkout opens in a new flow.
- On success, you return with
?success=trueand Adora polls until the plan activates. - If you cancel checkout, you return with
?canceled=true.
Manage billing (Stripe portal)
Subscribers use Manage Subscription to:- Update payment method
- View invoices and billing history
- Change plan or cancel (access continues until the period ends)
Admin billing
Tenant admins and platform admins see Admin → Billing in the sidebar (requires the core plan capability). The page mirrors account billing with an extra Billing History card that directs to the Stripe portal — invoices are not listed inside Adora.Any signed-in user can open Account → Billing for self-service upgrades. Only admins see the Admin billing page.
Related
Settings
Branding and PDF defaults unlock on Pro plans.
Reports
Advanced reports require AdoraPlan Pro or Suite.
Notifications
Billing alerts respect your notification preferences.
Dashboard
Plan limits may affect songs, programs, and members shown in metrics.